
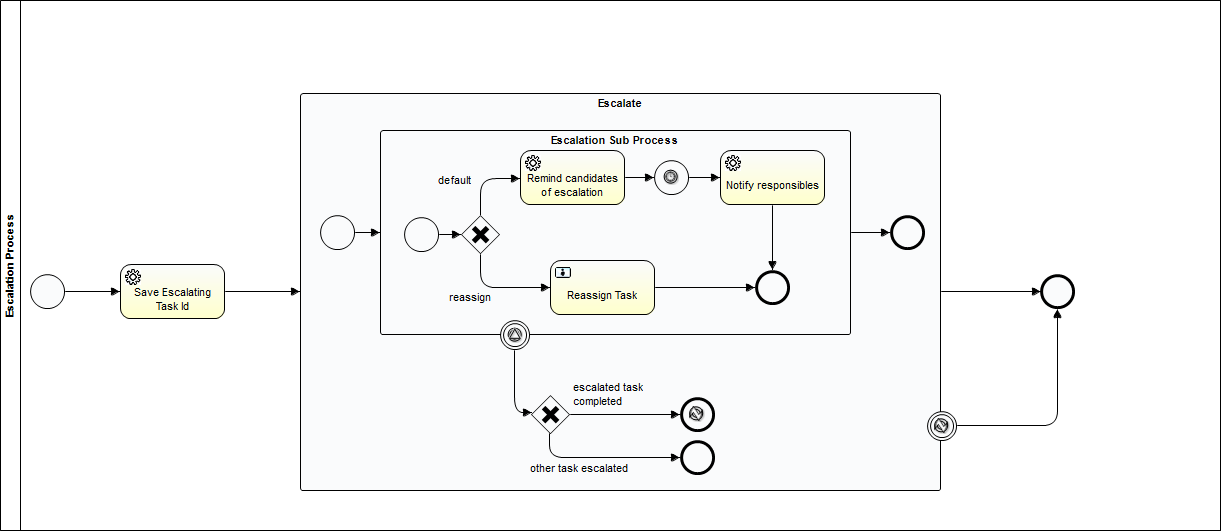
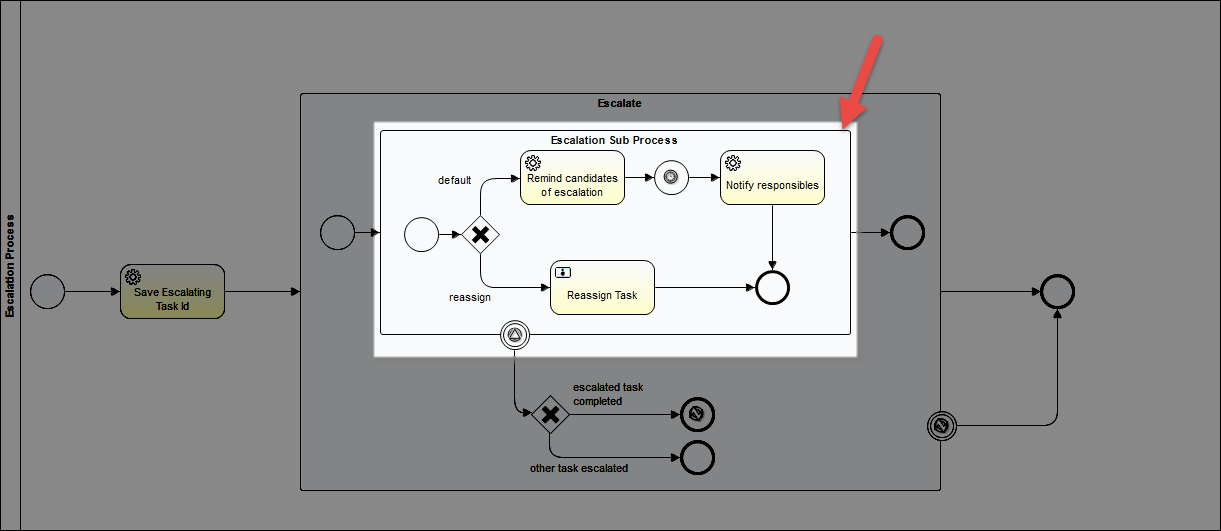
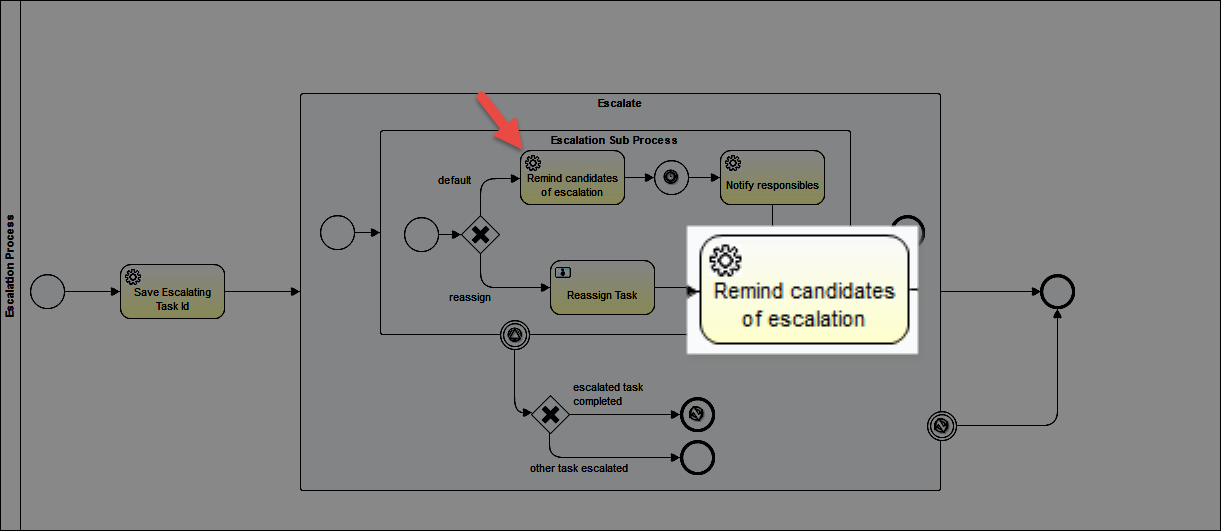
- Diagram
- Step 1: Create a new Activiti project and/or Activiti diagram
- Step 2: Change the Identifier, Name and Description of the Process
- Step 3: Create a Pool and Lanes
- Step 4: Create a Start and End Event
- Step 5: Save Escalating Task Id
- Step 6: Create “Escalate” Event Sub-Process
- Step 7: Create “Escalation Sub Process” Event Sub-Process
- Step 8: Create an Exclusive Gateway
- Step 9: Remind Candidates of Escalation
- Step 10: Create a Timer Intermediate Catching Event
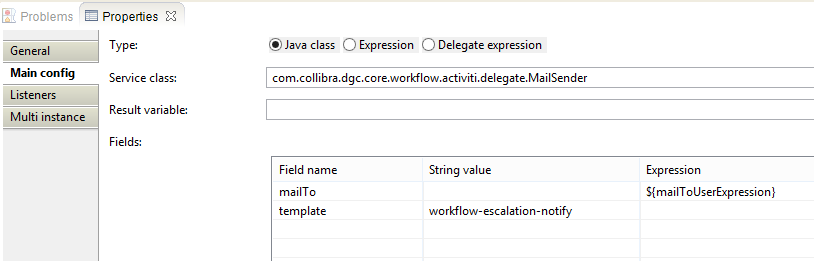
- Step 11: Notify Responsibilities
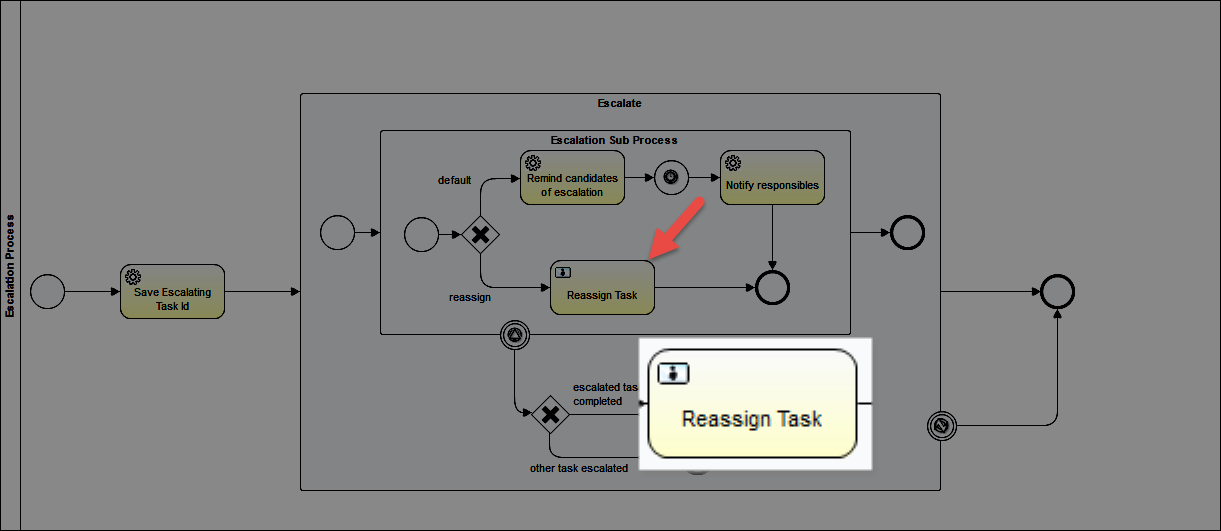
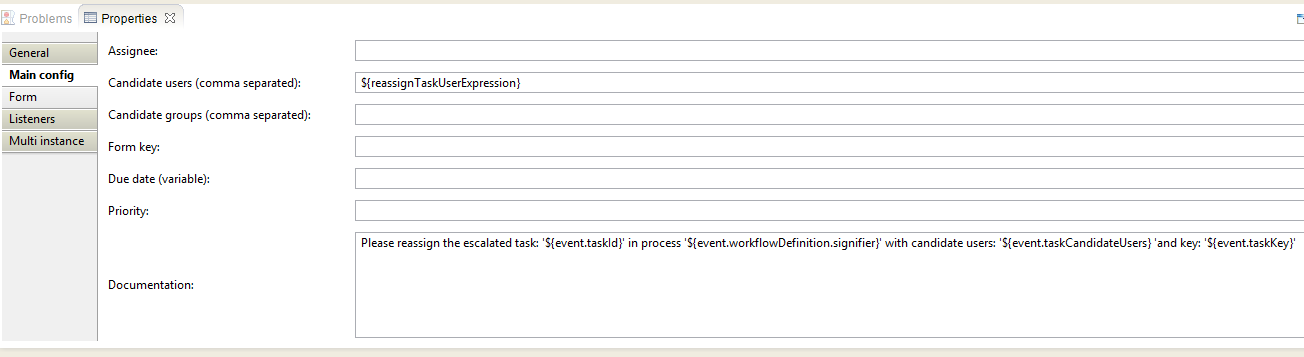
- Step 12: Reassign Task
- Step 13: Create a Second Default Gateway
[bok-callout]For a walk-through the steps of the workflow and its configuration, we refer to Escalation Process Walk-Through.[/bok-callout]
Diagram
Step 1: Create a new Activiti project and/or Activiti diagram
The creation of a new Activiti project/diagram is explained in the section on Setting Up Your Workflow Design Workbench
Step 2: Change the Identifier, Name and Description of the Process
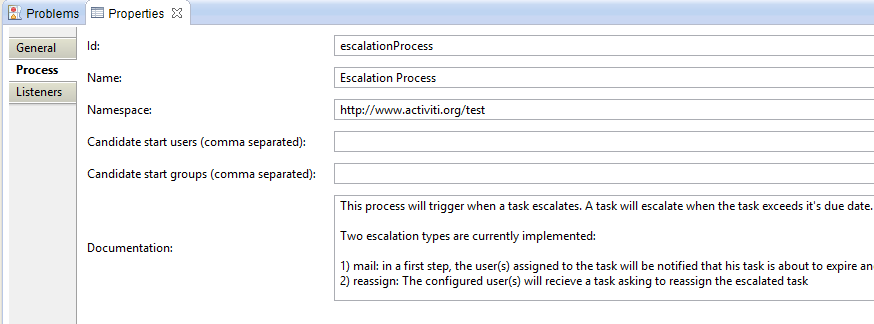
We refer to the section Designing Your First Workflow From Scratch, subsection “Change the Identifier, Name and Description of the Process” for an explanation on how to change the identifier, name and description. For this case, name the workflow (e.g., the default would be “Escalation Process”) and give it an identifier (e.g., the default name would be “escalationProcess”).
Step 3: Create a Pool and Lanes
We refer to the section Designing Your First Workflow From Scratch, subsection “Defining a Pool and Lanes” for an explanation on how to change the identifier, name and description. Start with a single pool:
Pool > Properties Tab > Process
| Property | Value | Description |
|---|---|---|
| id | escalationProcess | The Id of the workflow definition. This must be unique in Collibra |
| Name | Escalation Process | The default workflow label (description) in Collibra. |
| Namespace | http://www.activiti.org/test | |
| Documentation |
This process will trigger when a task escalates. A task will escalate when the task exceeds it’s due date. Depending on the escalation type of the task, this escalation process will perform different logic. Two escalation types are currently implemented: 1) mail: in a first step, the user(s) assigned to the task will be notified that his task is about to expire and he/they will be urged to perform the task as soon as possible. In a second step, after a configured time duration, the configured responsibles are notified that the user(s) exceeded the due date for their task and they can perform necessary actions. This process will end automatically when the original task would be completed in the meantime. |
This information is shown to the user when hovering over a workflow start button. |
Step 4: Create a Start and End Event
Add a start and end event for the workflow. The start event will contain Configuration Variables.

Set the properties of the start event:
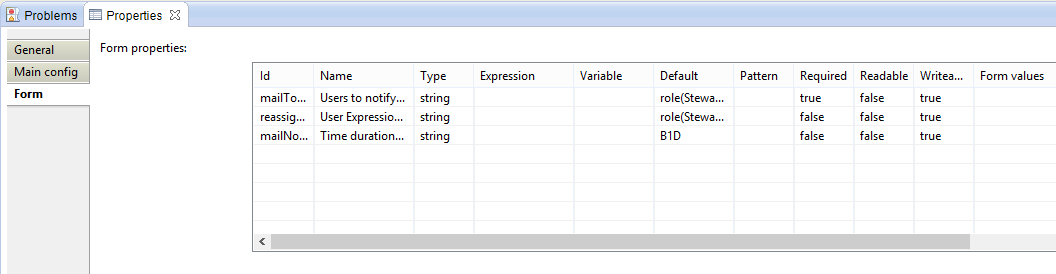
Start Event > Properties Tab > Form
|
Id |
Name |
Type |
Default |
Required |
Readable |
Writeable |
|---|---|---|---|---|---|---|
| mailToUserExpression | Users to notify in case of ‘mail’ escalation | string | role(Steward) | true | false | true |
| reassignTaskUserExpression | User Expression for users recieving the ‘reassign task’ in case of escalation type ‘reassign’ | string | role(Steward) | false | false | true |
| mailNotifyDuration | Time duration before the responsibles are notified of escalation | string | B1D | false | false | true |
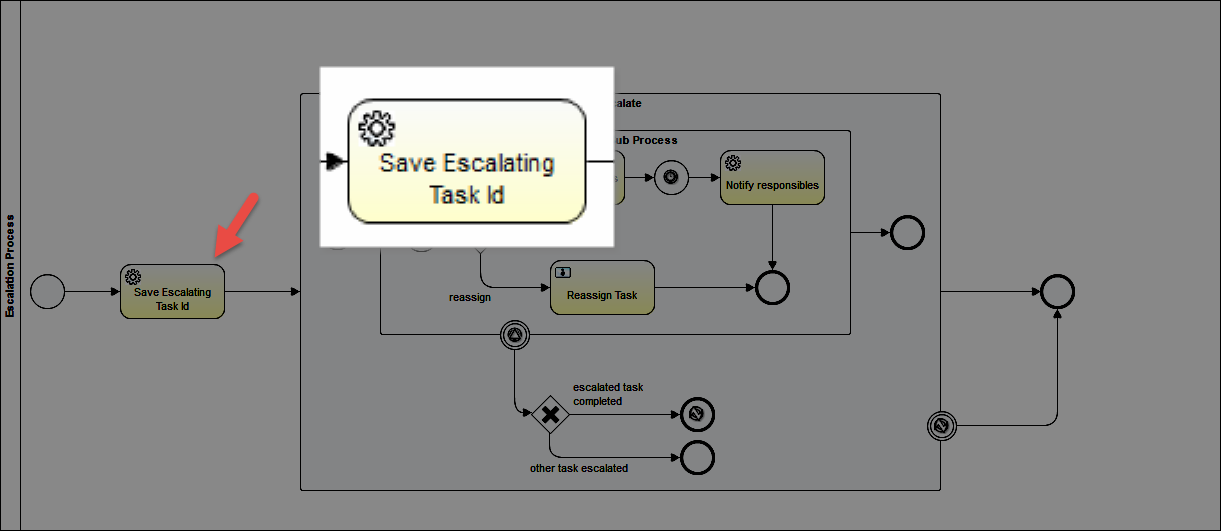
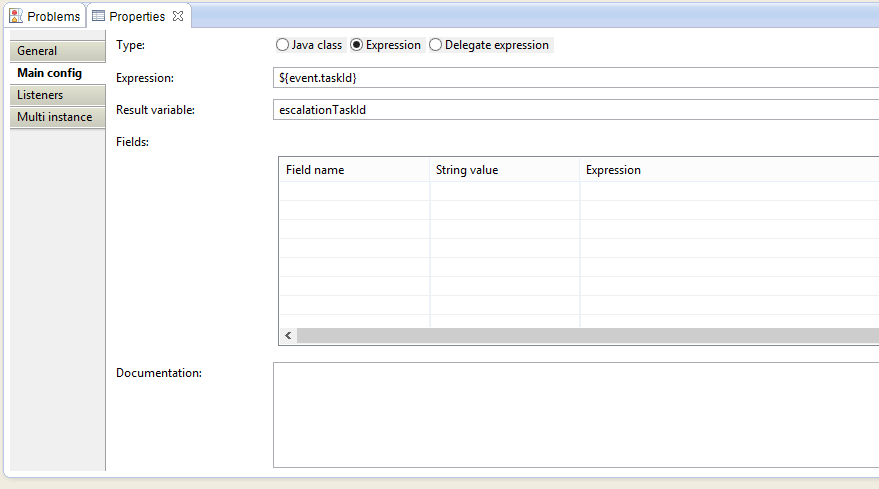
Step 5: Save Escalating Task Id
Create a service task to create a variable for the “Task Id”. The “Task Id” is the name name of the assigned task that the user will see.
Set the properties:
Service Task > Properties Tab > Main Config
|
Property
|
Value
|
Description
|
|---|---|---|
| Type | Expression | |
| Expression | ${event.taskId} | See the Event Bean documentation |
| Result variable | escalationTaskId | The result variable of the service task. It will be the Task Id |
[bok-callout]For more information about Beans, go to: Administrator’s Guide > Executing Logic > Beans[/bok-callout]
[bok-callout]Information about the EventBeans can be found here: <yourCollibraDomain>/docs/index.html > core > Package: com.collibra.dgc.core.workflow.activiti.bean> Class: EventBean[/bok-callout]
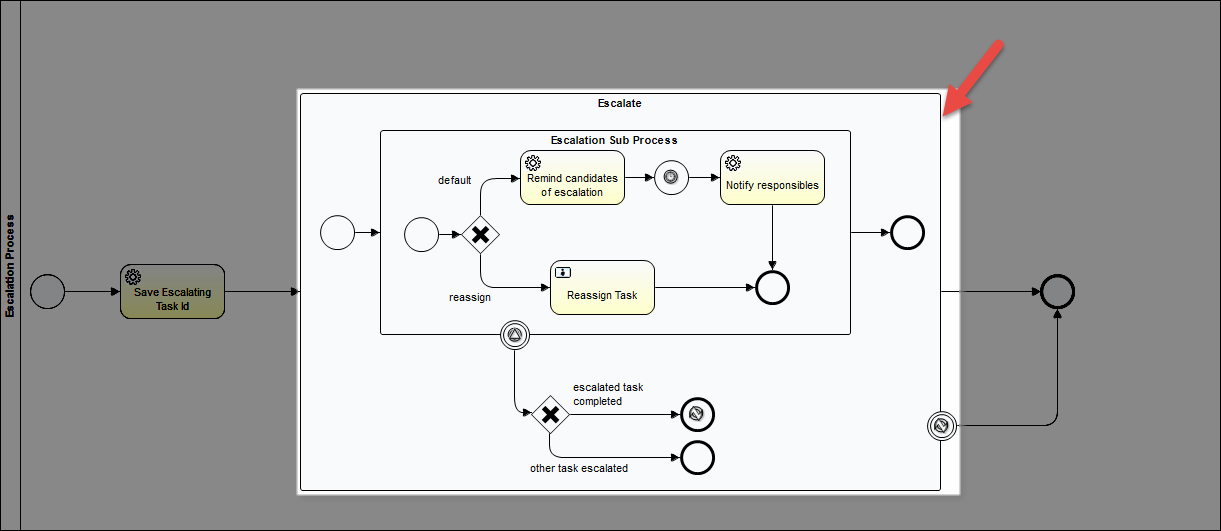
Step 6: Create “Escalate” Event Sub-Process
Create an Event Sub-Process with an Error Boundary Event. There must be start and end events within the Event Sub-Process.
Set the properties:
Event Sub-Process > Properties Tab > Main General
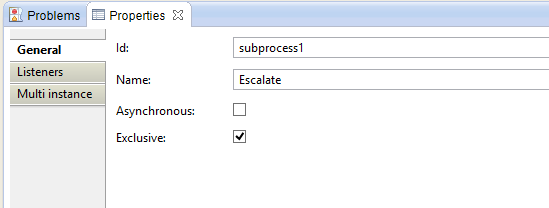
Name: Escalate
If any error event with the Error Code of “myError” happens within the Event Sub-Process, a signal will be sent to this Error Boundary Event. This Error Boundary Event leads to an End Event. Therefore, If “myError” is generated within the sub-process, the workflow will terminate.
Error Boundary Event > Properties Tab > Main Config
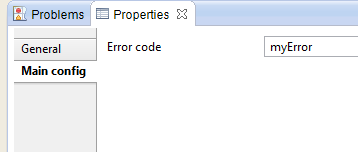
Error Code: myError
Description: This Error Boundary Event is looking for an Error Code of “myError” in order to trigger.
Step 7: Create “Escalation Sub Process” Event Sub-Process
Create an Event Sub-Process that will either notify candidates of escalation/responsibilities or will tell instruct a Steward to reassign the task. There must be start and end events within the Event Sub-Process.
Event Sub-Process > Properties Tab > Main General

Name: Escalation Sub Process
Boundary Signal Event > Properties Tab > Main Config
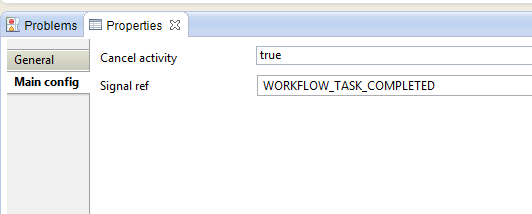
| Property | Value | Description |
|---|---|---|
| Cancel activity | true | This means that the Escalation Sub Process be cancelled if the signal is received. |
| Signal ref | WORKFLOW_TASK_COMPLETED | This is the signal that the it is waiting for. After receiving this signal, the workflow will direct out of the Boundary Signal Event |
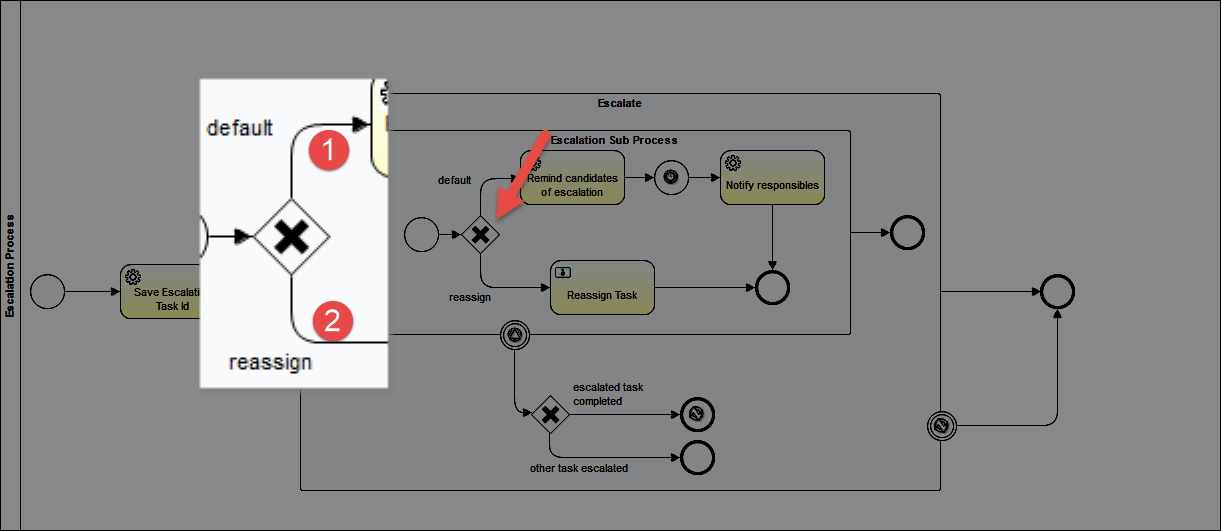
Step 8: Create an Exclusive Gateway
Create an exclusive gateway that will determine if the candidates should be notified of escalation/responsibilities or send a notice to reassign the task.
Set the properties:
Exclusive Gateway > Properties Tab > General
(No properties to set except the Name)
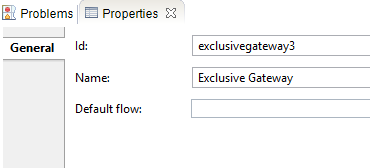
| Property | Value |
|---|---|
| Id | exclusivegateway3 |
| Name | Exclusive Gateway |
Sequence Flow 1 > Properties Tab > Main config
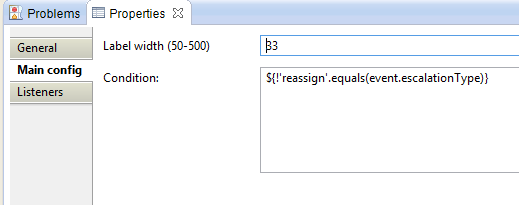
| Property | Value | Description |
|---|---|---|
| Label Width | 33 | The width of the label |
| Condition | ${!’reassign’.equals(event.escalationType)} | Will return “true” if event.escalationType = ‘reassign’. The “!” creates the logical opposite. |
Sequence Flow 2 > Properties Tab > Main config
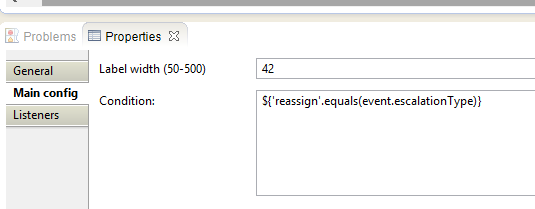
| Property | Value | Description |
|---|---|---|
| Label Width | 42 | The width of the label |
| Condition | ${‘reassign’.equals(event.escalationType)} | Will return “true” if event.escalationType = ‘reassign’. |
Step 9: Remind Candidates of Escalation
Create a service task that will email the candidate users to remind them of the escalation.
Set the properties:
Service Task > Properties Tab > Main config

| Property | Value | Description |
|---|---|---|
| Type | Java Class | Setting for delegate |
| Service Class | com.collibra.dgc.core.workflow.activiti.delegate.MailSender | |
Fields:
| Field name | String value | Expression | Description |
|---|---|---|---|
| template | workflow-escalation-reminder | the name of the template that will be used to generate the mail. | |
| mailToUsers | ${event.taskCandidateUsers} | user expression for users that will receive the action mail. See the EventBean |
[bok-callout]Information about the MailSender delegate can be found here: <yourCollibraDomain>/docs/index.html > core > Package: com.collibra.dgc.core.workflow.activiti.delgate > Class: MailSender
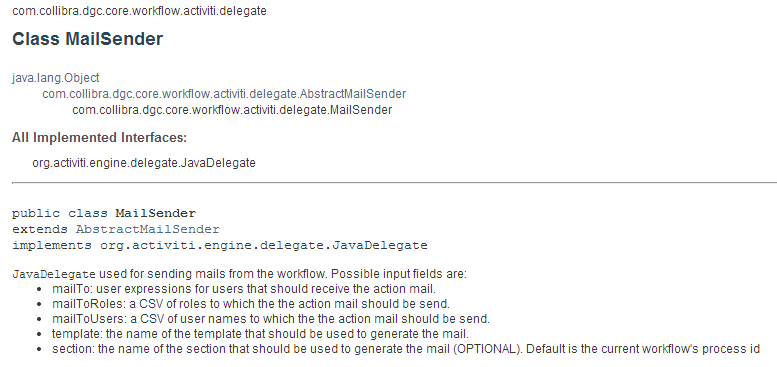 [/bok-callout]
Step 10: Create a Timer Intermediate Catching Event

Set the properties:
Timer Intermediate Catching Event > Properties Tab > Main config

| Property | Value | Description |
|---|---|---|
| Time duration | ${mailNotifyDuration} | See start event Configuration Variables |
Step 11: Notify Responsibilities
Create a service task that will email the candidate users to notify them of their responsibilities.
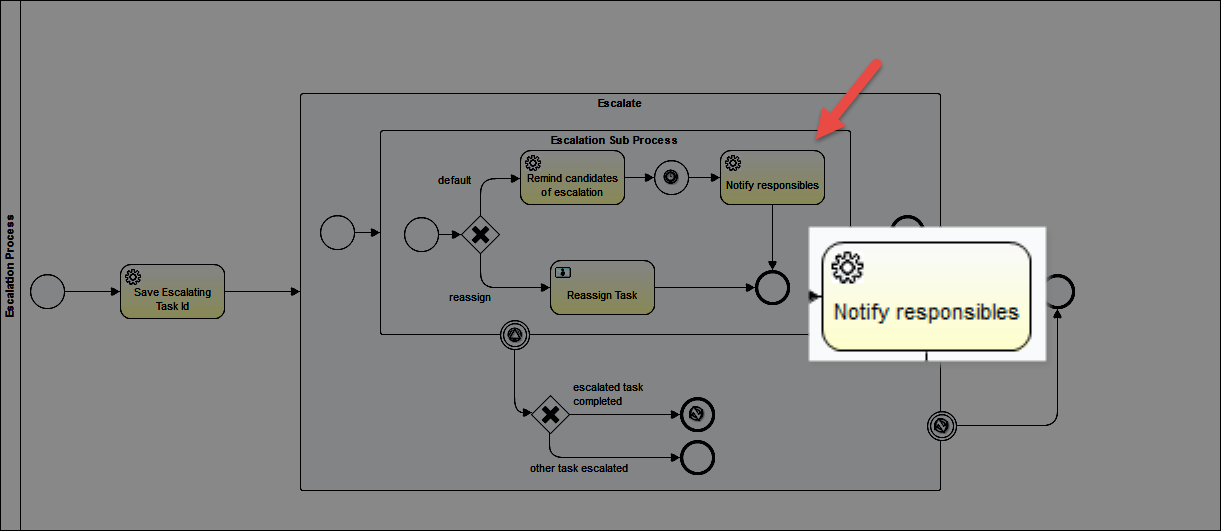
Service Task > Properties Tab > Main config
| Property | Value | Description |
|---|---|---|
| Type | Java Class | Setting for delegate |
| Service Class | com.collibra.dgc.core.workflow.activiti.delegate.MailSender | JavaDelegate used for sending mails from the workflow |
Fields:
| Field name | String value | Expression | Description |
|---|---|---|---|
| mailTo | ${mailToUserExpression} | user expressions for users that should receive the action mail. | |
| template | workflow-escalation-notify |
the name of the template that should be used to generate the mail. |
Step 12: Reassign Task
Create a User Task to tell the candidate user to reassign the task.
Set the properties:
User Task > Properties Tab > Main Config
| Property | Value | Description |
|---|---|---|
| Candidate Users | ${reassignTaskUserExpression} | See configuration variables on the Start Event |
| Documentation | Please reassign the escalated task: ‘${event.taskId}’ in process ‘${event.workflowDefinition.signifier}’ with candidate users: ‘${event.taskCandidateUsers} ‘and key: ‘${event.taskKey}’ | This text will be shown the the candidate user in the yellow task notification ribbon. |
Step 13: Create a Second Default Gateway
If the Signal Boundary Event receives the “WORKFLOW_TASK_COMPLETED” from any process. The workflow will flow into this new exclusive gateway.

Set the properties:
Exclusive Gateway > Properties Tab > General
(No properties to set except the Name)
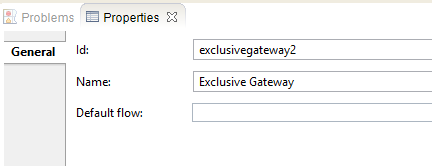
| Property | Value |
|---|---|
| Id | exclusivegateway2 |
| Name | Exclusive Gateway |
Sequence Flow 1 > Properties Tab > Main config

| Property | Value | Description |
|---|---|---|
| Label Width | 100 | The width of the label |
| Condition | ${escalationTaskId.equals(event.getTaskId())} | Signal events can come from any process. This assures that the Signal event relates to this process. The workflow goes to an error boundary event which leads to an end stop event. |
Sequence Flow 2 > Properties Tab > Main config
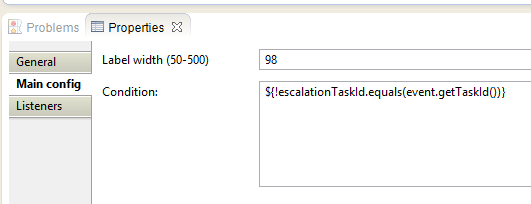
| Property | Value | Description |
|---|---|---|
| Label Width | 98 | The width of the label |
| Condition | ${!escalationTaskId.equals(event.getTaskId())} | Signal events can come from any process. This would mean that the Signal event does not relate to this process. The workflow is terminated |
You have to login to comment.