
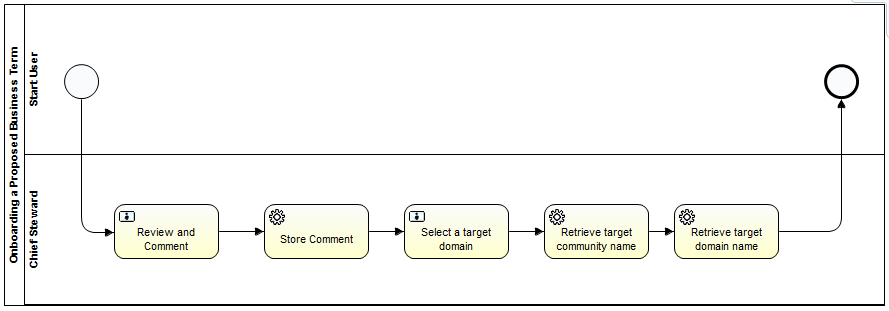
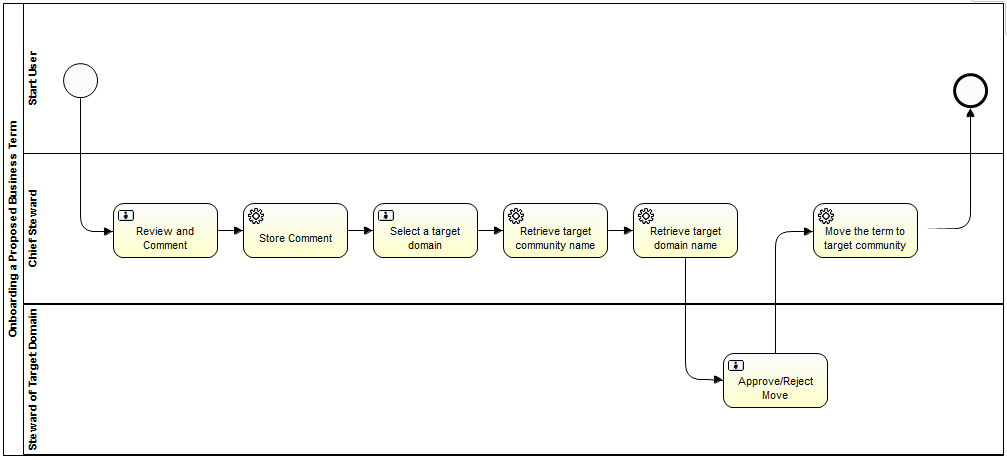
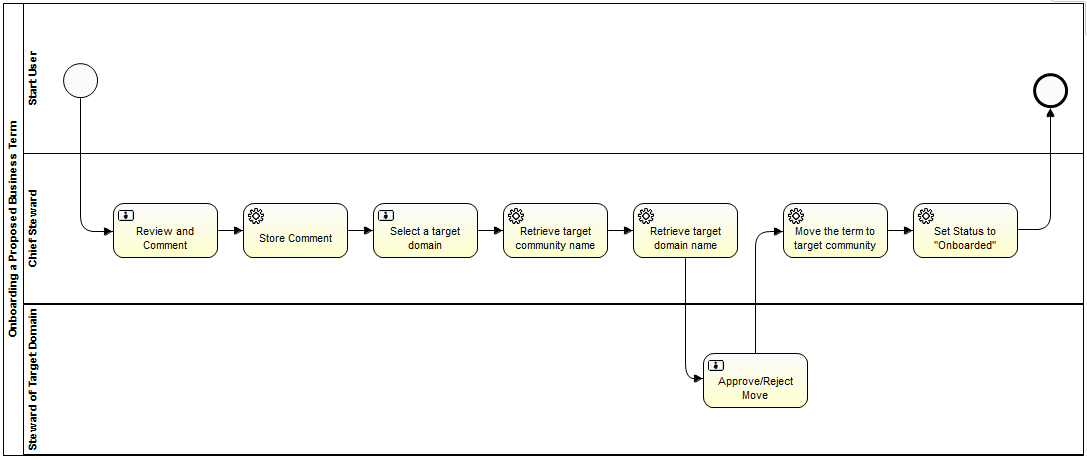
- BPMN Diagram
- Step 1: Create a new Activiti project and/or Activiti diagram
- Step 2: Change the Identifier, Name and Description of the Process
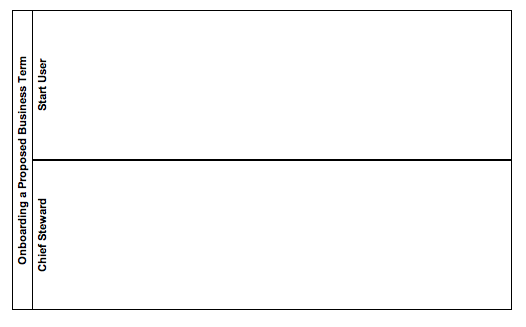
- Step 3: Create a Pool and Lanes
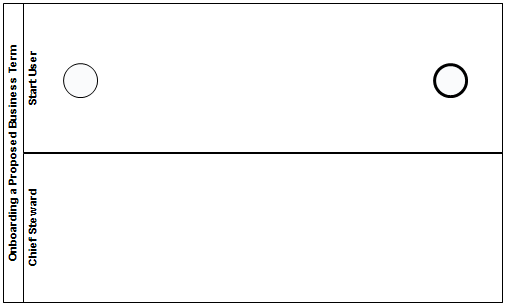
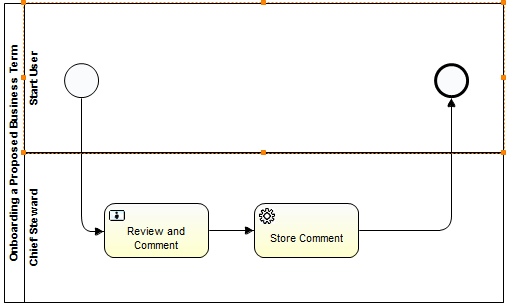
- Step 4: Create a Start and End Event
- Step 5: Create a User Task for Chief Steward to accept or reject the Business Term:
- Step 6: Create a Service Task to Store the Comment:
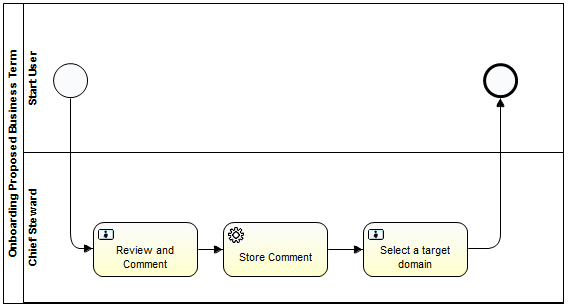
- Step 7: Create a User Task to Select the Target Domain
- Step 8: Create Two Service Tasks to Retrieve the Community and Domain Name of the selected Target Domain.
- Step 9: Create a User Task for the Steward to Approve the Move
- Step 10: Create a Service Task to Move the term to the Target Community and Domain
- Step 11: Create a Service Task to set the Status to “Onboarded”
- Step 12: Create an Alternate Path for The Chief Steward’s Rejection.
- Step 13: Create an Alternate Path for the Steward’s Rejection of the Target Domain.
[bok-callout]For a walk-through the steps of the workflow and its configuration, we refer to Onboarding Workflow Walk Through.[/bok-callout]
BPMN Diagram
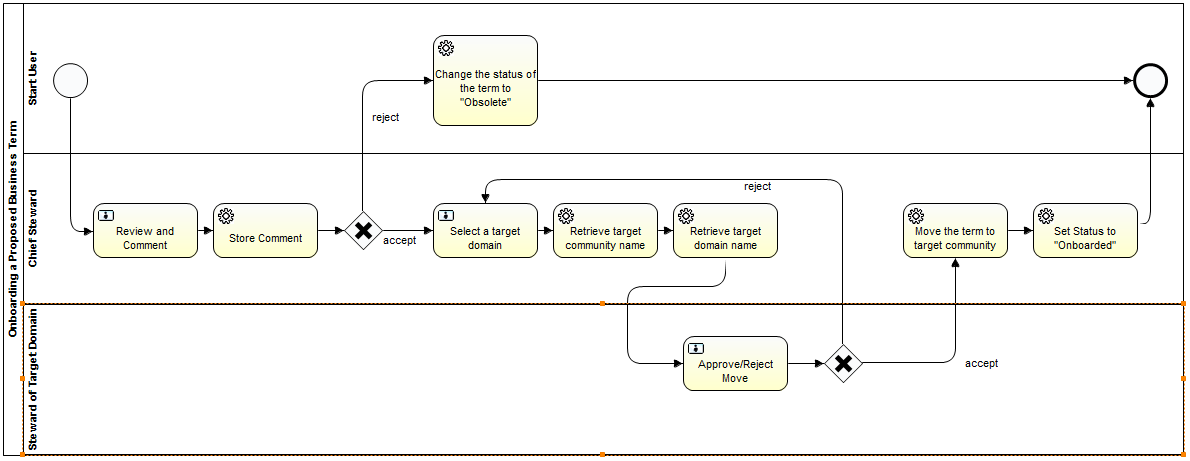
The source file can be downloaded here.
Step 1: Create a new Activiti project and/or Activiti diagram
The creation of a new Activiti project/diagram is explained in the section on Setting Up Your Workflow Design Workbench
Step 2: Change the Identifier, Name and Description of the Process
We refer to the section Designing Your First Workflow From Scratch, subsection “Change the Identifier, Name and Description of the Process” for an explanation on how to change the identifier, name and description. For this case, name the workflow (e.g., the default would be “Onboarding Workflow”) and give it an identifier (e.g., the default name would be “onboardingWorkflow”).
Step 3: Create a Pool and Lanes
We refer to the section Designing Your First Workflow From Scratch, subsection “Defining a Pool and Lanes” for an explanation on how to change the identifier, name and description. Start with a lane for the Start User and a lane for the Chief Steward.
Step 4: Create a Start and End Event
We refer to the section Designing Your First Workflow From Scratch, subsection “Create a Start / End Event” for a general explanation.
Step 5: Create a User Task for Chief Steward to accept or reject the Business Term:
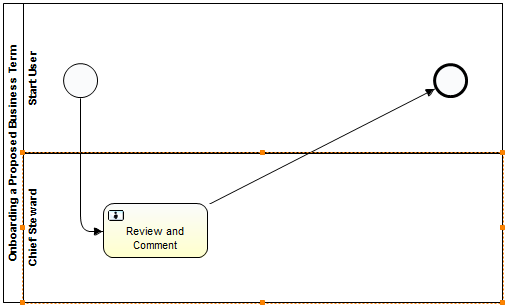
Set the Candidate users to ${chiefStewardUserExpression}. This is the user variable from the Start Event. (created below)
Create the user variable for the Candidate user on the Start Event (Start Event > Properties Tab > Form Tab > New Button):

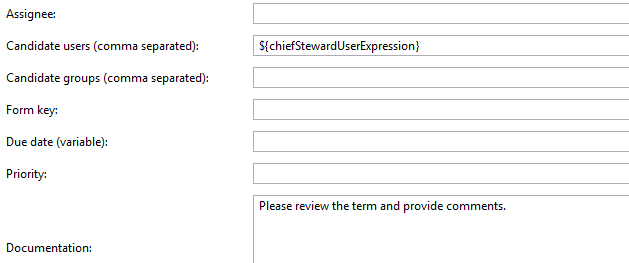
Create a form on the “Review and Comment” User Task. The form properties on this task are shown below:

Step 6: Create a Service Task to Store the Comment:
The form on the previous task prompted the user for a comment. This task will store that comment that was collected from the user form on the “Review and Comment” user task.
Click on the “Store Comment Task” and use the addComment Component. This is shown below:
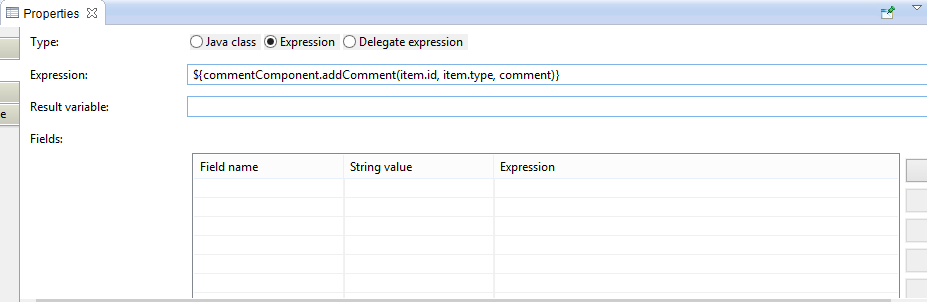
The documentation for this class is below:
addComment
Comment addComment(String baseResource,
                 String baseResourceType,
                 String content)
Comment on a base Resource.Parameters
baseResource – id of the Resource on which the Comment is postedbaseResourceType – The type of the base Resource (i.e. The name of the ResourceType)content – Content of the comment to be posted
Returns:
Comment
baseResource: Item.id. (See Developing Workflows Subsection “Beans” for an explanation of beans.)
- Provides the Item’s UUID
baseResourceType: Item.Type
- Provides the Item Types UUID
content: comment
- the “comment” variable holds the string value of the comment which was created in the previous task.
Step 7: Create a User Task to Select the Target Domain
Create a form to prompt the user to select the target domain:

Set the Candidate users to ${chiefStewardUserExpression}. This variable is already created in step 4 above. Also, be sure to put a description of the task into the documentation text area:

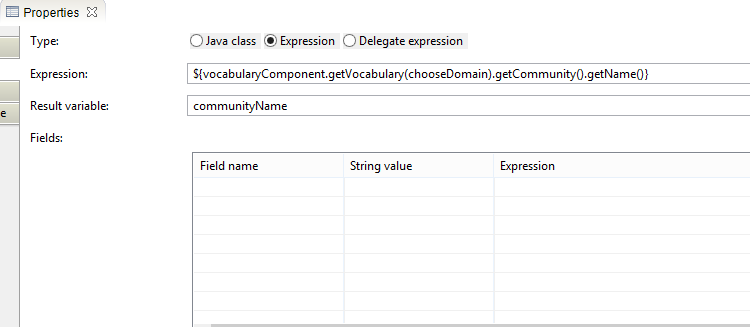
Step 8: Create Two Service Tasks to Retrieve the Community and Domain Name of the selected Target Domain.
These service tasks will each create a single return variable. The “Retrieve target community name” service task retrieves the Community name from the Domain name from the Domain selected in the previous user task. Below is the expression for the “Retrieve target community name” Task:
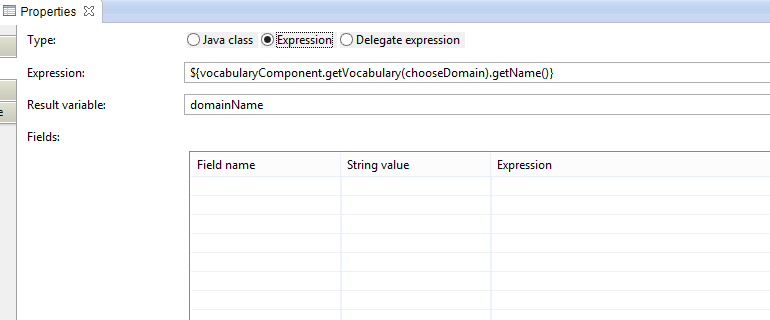
The “Retrieve target domain name” service task retrieves the Domain name from the Domain chosen from the previous user task. Here is the expression:
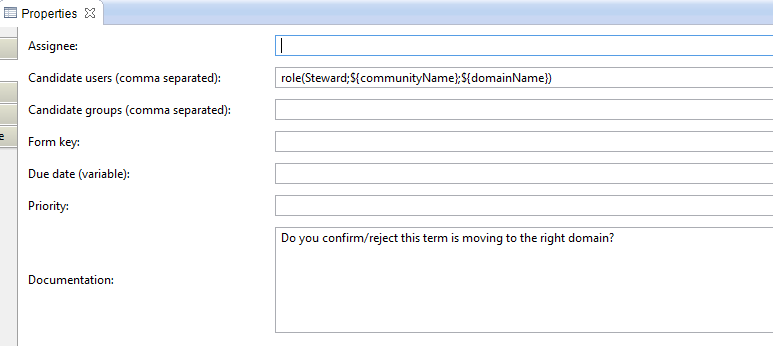
Step 9: Create a User Task for the Steward to Approve the Move
A new Lane must first be created for the “Steward of the Target Domain.”
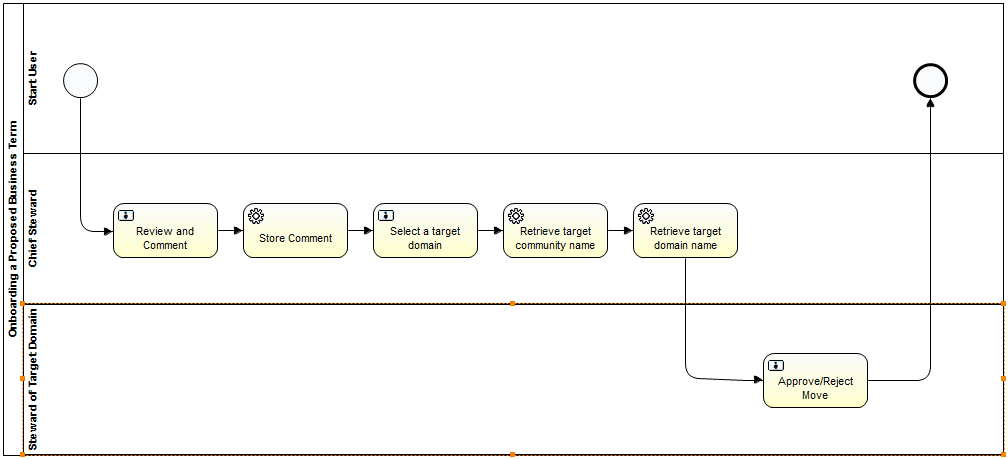
The Candidate users is created using a Candidate User Expression. Documentation for this can be found in the Managing Workflows section of Administrator’s Guide subsection “Candidate user expressions.” This task will use the “role(<roleName>; <communityName>; <vocabularyName>)” expression. The Community and Domain name variables were created in the previous step. They are communityName and domainName.
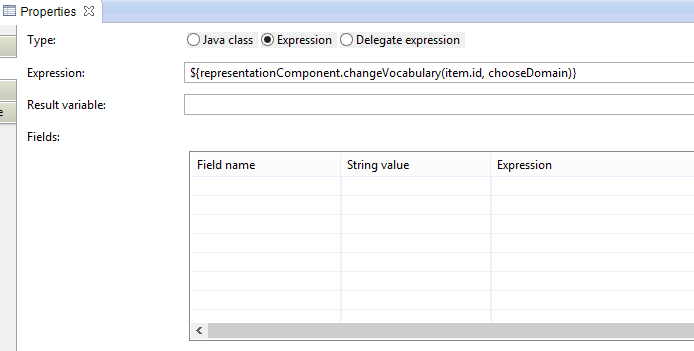
Step 10: Create a Service Task to Move the term to the Target Community and Domain
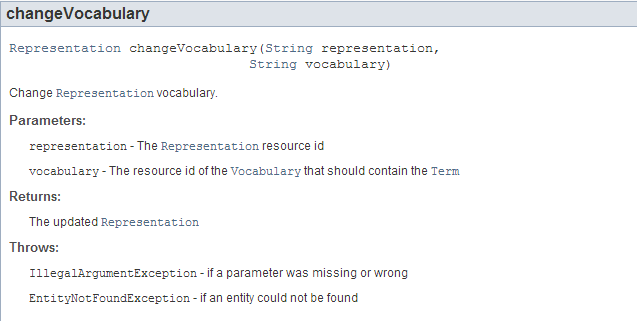
This service task uses the changeVocabulary method of the RepresentationComponent. See the expression below for the “Move the term to target community” task:
This is the documentation for the method found in the core API documentation:
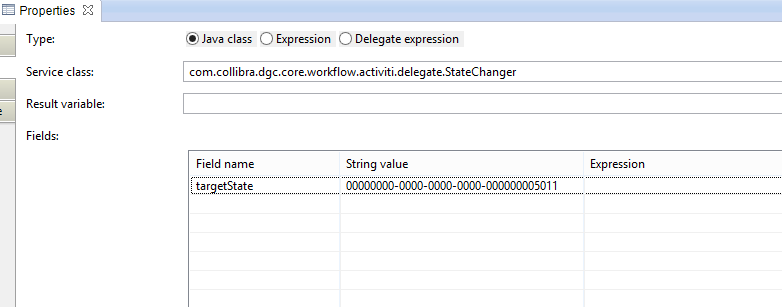
Step 11: Create a Service Task to set the Status to “Onboarded”
This task will use StateChanger Delegate. An explanation of delegates can be found in the Developing Workflows section of the Administrator’s Guide subsection “Delegates.”

Step 12: Create an Alternate Path for The Chief Steward’s Rejection.
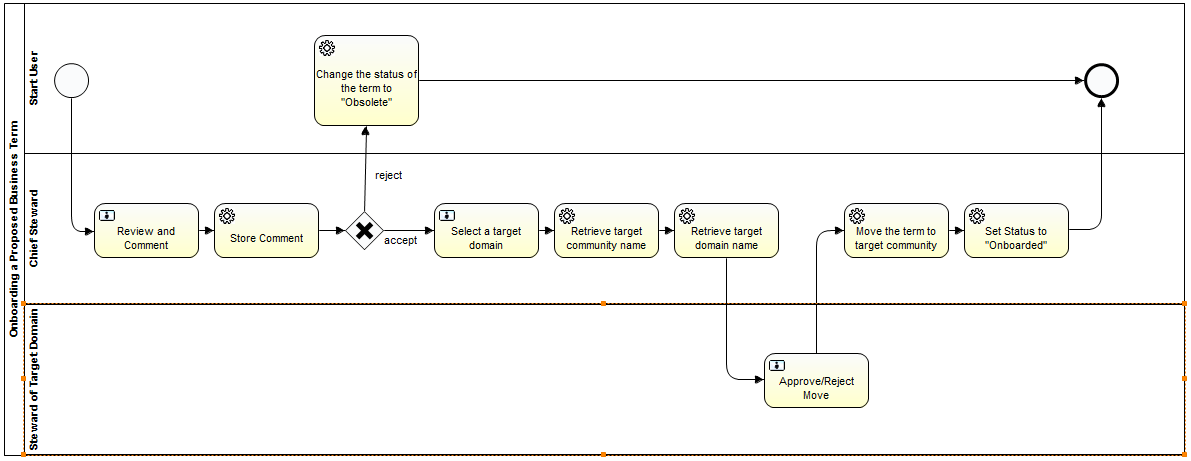
The Exclusive Gateway requires two outward sequence flows. There must be two sequence flows from the gateway. One must have a value of “true” , and the other must have a value of “false.” The “true” or “false” comes from the button form type in the “Review and Comment” service task. An explanation of Button Form Types can be found in the Developing Workflows section of the Administrator’s Guide subsection “Custom for types.”
“accept” sequence flow Condition: ${acceptButton}
“reject” sequence flow Condition: ${rejectButton}
If the user presses the accept button, the workflow will continue on its original path. The reject button will redirect the workflow down an alternate path. This path will change the status to “Obsolete” and the workflow terminates.
A service task must be created to change the status to Rejected. The following properties are for this service task. It is done in the same way as step 9
Step 13: Create an Alternate Path for the Steward’s Rejection of the Target Domain.
If the Steward rejects the target domain, the Chief must re-select the target domain. This creates a loop
You have to login to comment.