
Walk-through
[bok-callout]For a walk-through and configuration of this Workflow, we refer to Walk Through the Simple Approval Workflow.[/bok-callout]
Implementation
Step 1: Create a new Activiti project and/or Activiti diagram
The creation of a new Activiti project/diagram is explained in the section on Setting Up Your Workflow Design Workbench
Step 2: Change the Identifier, Name and Description of the Process
We refer to the section Designing Your First Workflow From Scratch, subsection “Change the Identifier, Name and Description of the Process” for an explanation on how to change the identifier, name and description. For this case, name the Workflow (e.g., the default would be “Simple Approval”) and give it an identifier (e.g., the default name would be “simpleApprovalProcess”).
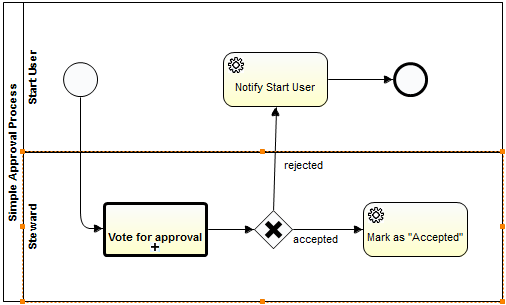
Step 3: Create a Pool and Lanes
We refer to the section Designing Your First Workflow From Scratch, subsection “Defining a Pool and Lanes” for an explanation on how to change the identifier, name and description. Start with a lane for the “Start User” and a lane for the “Steward”.

Step 4: Create a Start and End Event
We refer to the section Designing Your First Workflow From Scratch, subsection “Create a Start / End Event” for a general explanation. In the Start Event we are creating a number of form properties which will be invisible to the end user. The summary is shown below:

For every lane we will create a default user expression. We have two resource roles involved.
- stewardUserExpression: a string value that provides a default value for the Steward lane, i.e., “role(Steward)”;
- stakeholderUserExpression: a string value that provides a default value for the Steward lane, i.e., “role(Stakeholder)”.
These user expression form variables allow us to change the resources role in the Workflow configuration pane without the need to change and redeploy the Workflow definition itself. By setting the form properties on readable = false, they will appear in the variables section of the configuration pane, as shown below.
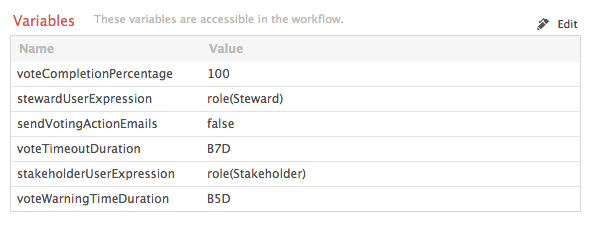
Furthermore, we foresee three other form properties that allow us to reconfigure the voting task involved:
- votingCompletionPercentage with default value ‘100’, which means that for a positive voting result to be achieved, all stewards must vote positively.
- votingTimeDuration;
- votingWarningTimeDuration;
- sendVotingActionMails: by default set on false.
For more on the configuration we refer to the walk-through of this Workflow.
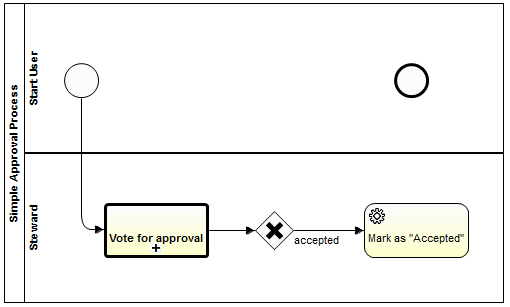
Step 5: Create a Call Activity that Calls a Voting Sub Process
Refer to the section Designing Your First Workflow From Scratch, subsection “Defining a Call Activity” for an explanation of calling the Vote for Approval Sub-process.
Input Parameters:
The source parameters are those defined in the start event form (see Step 4) and passed on to the target parameters, the latter which are the form properties of the voting sub-process (see its implementation guide).
|
Source
|
Source Expression
|
Target
|
|---|---|---|
| ${‘Please vote for the approval of the ‘}${item.getConceptTypeName()}${‘.’}${” If you reject, please provide a reason for doing so.”} | decisionInfo | |
| stewardUserExpression | voterUserExpression | |
| voteCompletionPercentage | votePercentage | |
| ${true} | addComments | |
| ${true} | earlyComplete | |
| voteWarningTimeDuration | voteWarningTimeDuration | |
| voteTimeoutDuration | voteTimeoutDuration | |
| ${“Approve/Reject”} | voteButtonLabel | |
| ${“Approval”} | voteTaskName | |
| sendVotingActionEmails | sendActionEmail |
Step 6: Create an Exclusive Gateway
Refer to the section Designing Your First Workflow From Scratch, subsection “Defining an Exclusive Gateway” for an explanation.

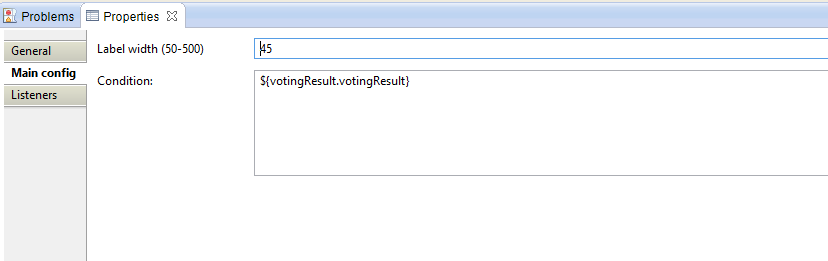
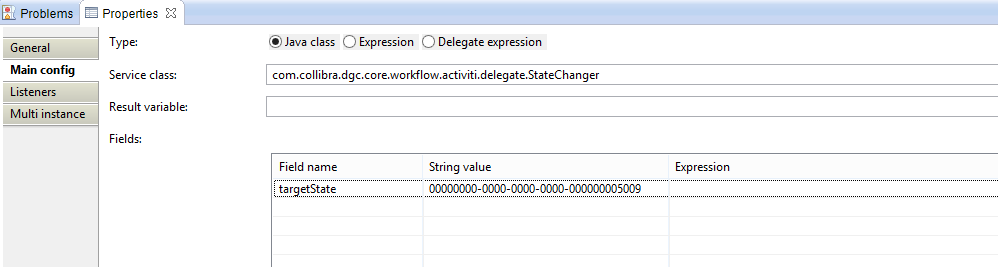
Step 7: Create a Service Task to Mark the Term as “Accepted”
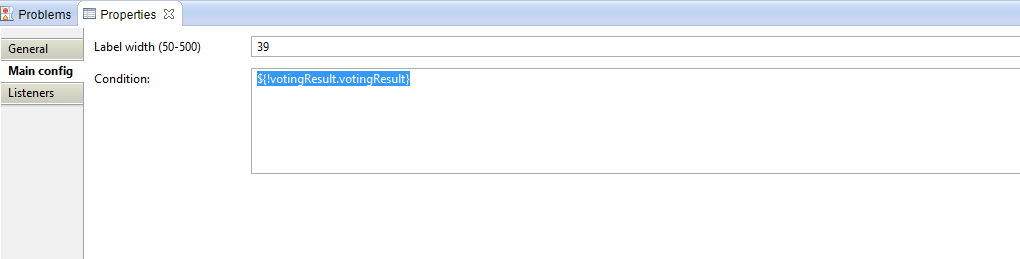
Before configuring the “Mark as Accepted” task, the “accepted” sequence flow must have a Condition of ${votingResult.votingResult}
Refer to the section Designing Your First Workflow From Scratch, subsection “Defining a Service Task to Change the Status of an Asset ” for an explanation of changing the status of an asset.
Step 8: Create a Service Task to Notify the Start User of Rejection
This is the alternate path for if the the voting process rejects the term. If the term is rejected, an email notification goes out to the Start User.
Refer to the section Designing Your First Workflow From Scratch, subsection “Defining a Service Task that sends an email-notification” for an explanation of sending an email notification.
Before configuring the “Notify Start User” task, the “rejected” sequence flow must have a Condition of ${!votingResult.votingResult}. The exclamation point provides the logical opposite of the variable that it precedes.
The properties for the the “Notify Start User” task are as follows:
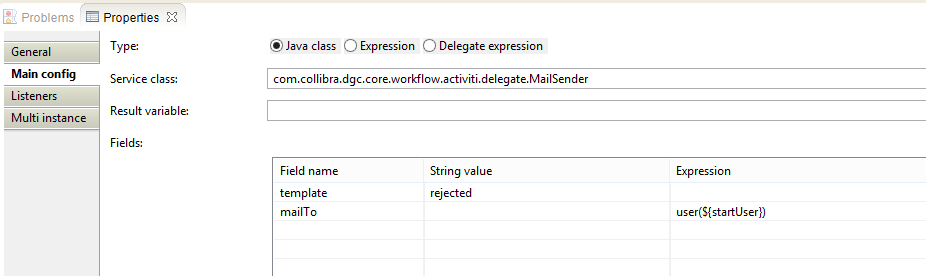
Refer to the Developing Workflows Administrator’s guide subsection “MailSenderDelegate” for information about using this Delegate.
This alternate path is now closed and we can continue on the “happy path.”
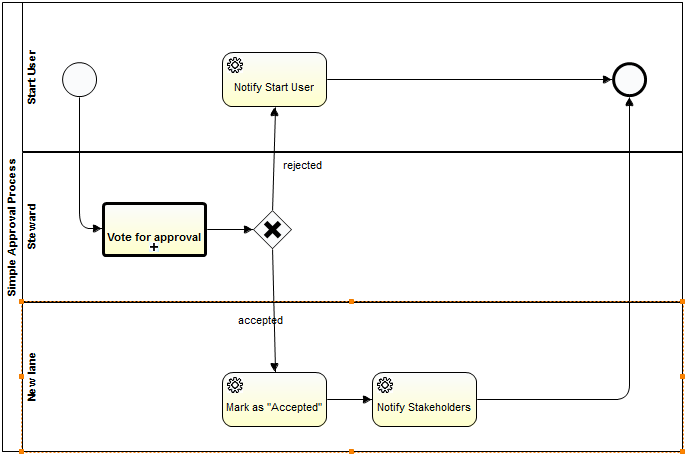
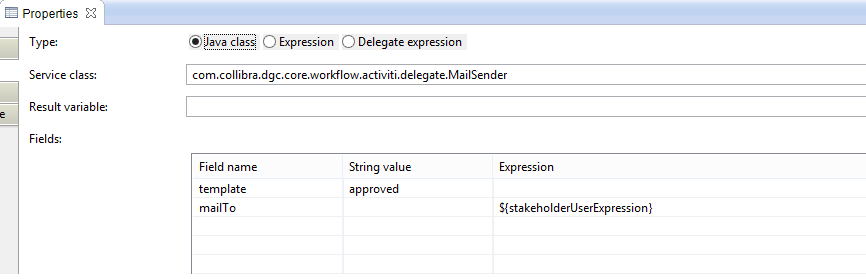
Step 9: Create a Service Task to Notify the Stakeholders
Create a new lane for the “Stakeholders” and create another MailSender Delegate Task inside that lane. This is very similar to step 7. The configuration properties are shown below:
Step 10 Create a Service Task to Notify the Start User

The configuration properties for the service task shown below:

You have to login to comment.