
- Step 1: Create a new Activiti project and/or Activiti diagram
- Step 2: Change the Identifier, Name and Description of the Process
- Step 3: Create a Start and End Event
- Step 4: Create list of voters
- Step 5: Create Vote Sub-Process
- Step 6: Create the Voting Form
- Step 7: Send Reminder Mail
- Step 8: Add Vote Outcome to List
- Step 9: Store Comment
- Step 10: Count voting result
- Step 11: Publish Result
[bok-callout]For a walk-through the steps of the workflow and its configuration, we refer to Voting Sub-Process Walk-Through[/bok-callout]
Over view of the completed workflow

Step 1: Create a new Activiti project and/or Activiti diagram
The creation of a new Activiti project/diagram is explained in the section on Setting Up Your Workflow Design Workbench
Step 2: Change the Identifier, Name and Description of the Process
We refer to the section Designing Your First Workflow From Scratch, subsection “Change the Identifier, Name and Description of the Process” for an explanation on how to change the identifier, name and description. For this case, name the workflow (e.g., the default would be “Voting Sub Process”) and give it an identifier (e.g., the default name would be “votingSubProcess”).
Step 3: Create a Start and End Event
We refer to the section Designing Your First Workflow From Scratch, subsection “Create a Start / End Event” for a general explanation.
Add the start and end events:

Add the Configuration Variables to the start event:
Start Event > Properties Tab > Form

Configuration Variables:
| Id | Name | Type | Default | Required | Readable | Writeable |
|---|---|---|---|---|---|---|
| decisionInfo | Decision Info | string | true | true | true | |
| voterUserExpression | The user expression resulting to users required to vote | string | true | true | true | |
| votePercentage | The percentage of voters that are needed to approve (%) | long | 50 | true | true | true |
| voteWarningTimeDuration | Time duration before a warning mail is send to vote | string | B3D | true | true | true |
| voteTimeoutDuration | Time duration before the voting is stopped and the process continued | string | B5D | true | true | true |
| addComments | Add voting comments to resource | boolean | false | false | true | true |
| addCommentsToParent | Provide the id of a comment if you want comments to be added to a parent comment | string | true | true | true | |
| earlyComplete | Stop voting if votingPercentage is impossible to reach | boolean | false | true | true | true |
| voteButtonLabel | Label for the voting button | string | true | true | true | |
| voteTaskName | The name of the actual voting task | string | true | true | true | |
| sendActionEmail | Send a mail to the users allowing completing the vote by sending a email | boolean | false | false | true | true |
Step 4: Create list of voters
Create a service task that will create a list of voters.

Set the Properties:
Service Task > Properties Tab > Main config
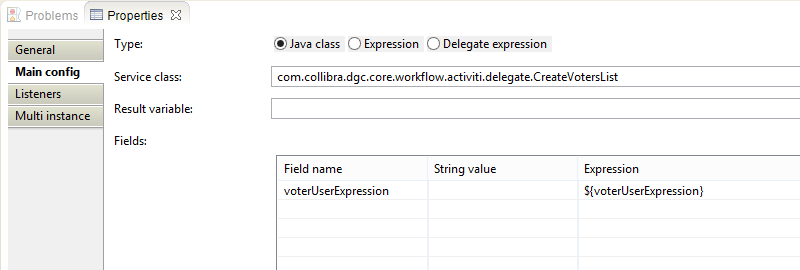
| Setting | Value | Description |
|---|---|---|
| Service class | com.collibra.dgc.core.workflow.activiti.delegate.CreateVotersList | This is the name of the delegate class |
| voterUserExpression | {voterUserExpression} | The delegate needs to the know the role to be counted. In this case it will be a Steward |
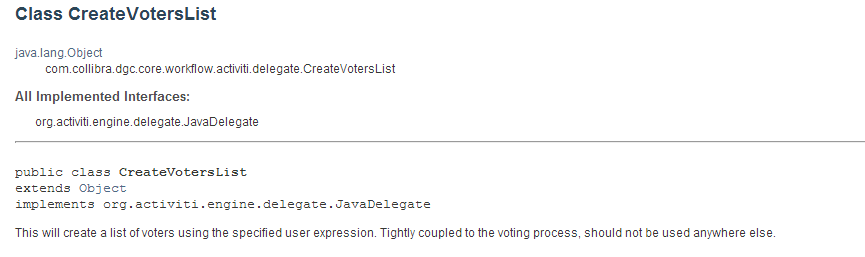
This Delegate Class can be found at: <yourCollibraDomain>/docs/index.html > core >Package: com.collibra.dgc.core.workflow.activiti.delegate > Interface: CreateVotersList
[bok-callout]For more information about Delegates, go to: Developing Workflows > Delegates[/bok-callout]
Step 5: Create Vote Sub-Process
Create an EventSubProcess container

Give the EventSubProcess an Id and Name:
EventSubProcess > Properites Tab > General
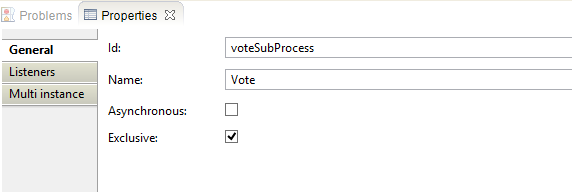
| Setting | Value | Description |
|---|---|---|
| Id | voteSubProcess | The Id of the sub-process. It will be used to call the sub-process from another workflow |
| Name | Vote | Provides a label for the sub-process |
Make this EventSubProcess a loop by Using the “Multi instance” settings. The Vote event sub-process will be repeated for each voter:
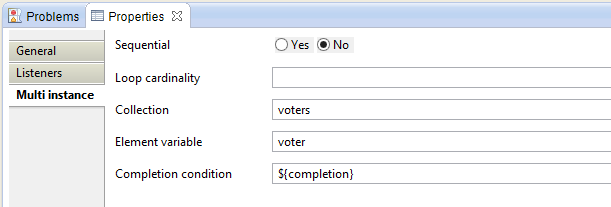
| Setting | Value | Description |
|---|---|---|
| Collection | voters | The list to loop through (Output variable by createVoterList delegate) |
| Element variable | voter | The single voter of the voter list |
| Completion condition | ${completion} | Condition of when to stop the loop (Output variable by createVoterList delegate) |
Add a Timer Boundary Event to determine the voting period.
Timer Boundary Event > Properties Tab > Main Config
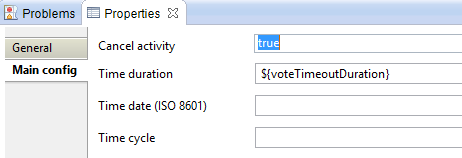
| Setting | Value | Description |
|---|---|---|
| Cancel activity | false | |
| Time Duration | ${voteTimeoutDuration} | The duration variable when the event will fire. See the Configuration Variables |
Step 6: Create the Voting Form
Create a User Task that will create the voting form for the user

Set the Properties:
Create a form for the user to vote:
User Task > Properties Tab > Form

| Id | Name | Type | Default | Required | Readable | Writeable |
|---|---|---|---|---|---|---|
| comment | What is your reason for approving/rejecting? | textarea | false | true | true | |
| approve | Approve | button | false | true | true | true |
| reject | Reject | button | false | true | true | true |
| voteButton | ${voteButtonLabel} | taskButton | false | true | false |
[bok-callout]For more information about Form Types, go to: Developing Workflows > Form Types [/bok-callout]
User Task > Properties Tab > Main config
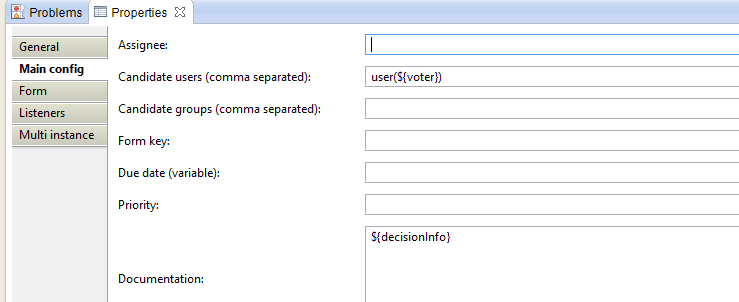
| Setting | Value | Description |
|---|---|---|
| Candidate users | user(${voter}) | This variable is from the Multi Instance of the EventSubProcess |
| Documentation | ${decisionInfo} | This variable is from the Configuration Variables on the Start Event. Provides a description of the task to the user |
User Task > Properties Tab > Listeners
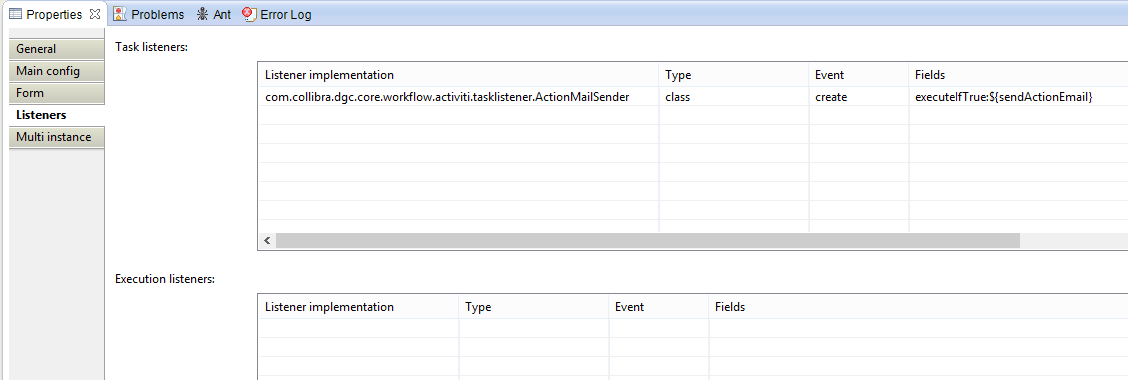
| Listener implementation | Type | Event | Fields | Description |
|---|---|---|---|---|
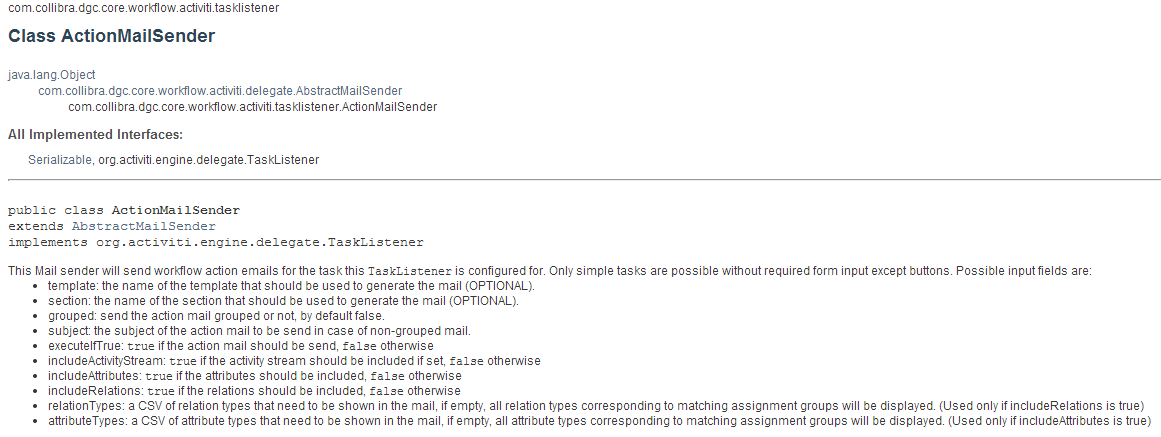
| com.collibra.dgc.core.workflow.activiti.tasklistener.ActionMailSender | class | create | executeIfTrue:${sendActionEmail} | This Mail sender will send workflow action emails for the task that this Task Listener is configured for. Only simple tasks are possible without required form input except buttons. Setting executeIfTrue to “True” will determine if action email is sent |
Documentation of this Task Listener can be found at: <yourCollibraDomain>/docs/index.html > core >Package: com.collibra.dgc.core.workflow.activiti.tasklistener > Interface: ActionMailSender
Step 7: Send Reminder Mail
Create a service task to send a reminder email based on a boundary timer:

Add the TimerBoundaryEvent to the ${votTaskName} User Task and set its properties:
TimerBoundaryEvent > Properties Tab > Main config
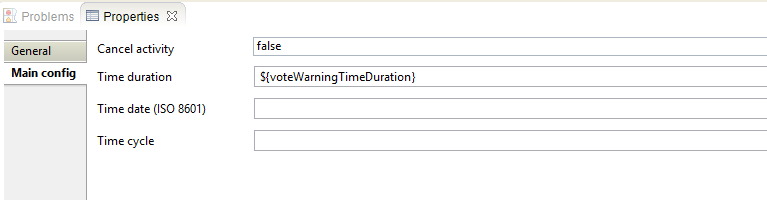
| Setting | Value | Description |
|---|---|---|
| Cancel activity | false | |
| Time Duration | ${voteWarningTimeDuration} | The duration variable when the event will fire. See the Configuration Variables |
[bok-callout]For more information about Duration Variables, go to: Managing Workflows > Duration Variables[/bok-callout]
Create the Send reminder mail service task. This service task will use the MailSender Delegate. Set its properties:
Service Task > Properties Tab > Main config
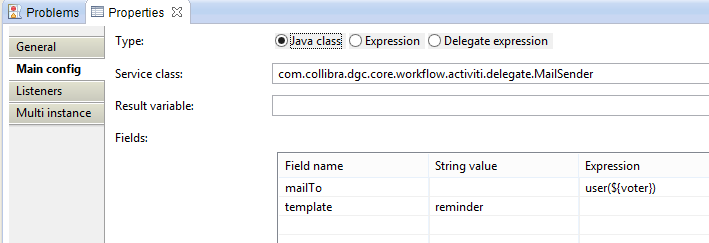
| Setting | Value | Description |
|---|---|---|
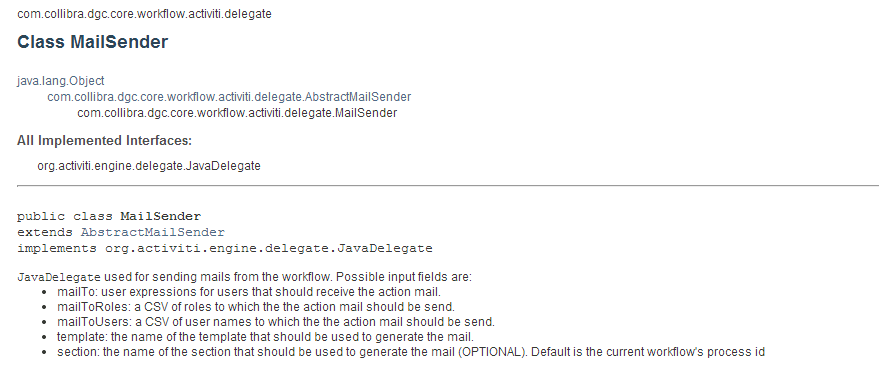
| Service class | com.collibra.dgc.core.workflow.activiti.delegate.MailSender | MailSender Delegate class |
Fields:
| Field name | String value | Expression | Description |
|---|---|---|---|
| mailTo | user(${voter}) | The input for the email recipient. It will be the voter. | |
| template | reminder | The input field for the email template |
This Delegate Class can be found at: <yourCollibraDomain>/docs/index.html > core >Package: com.collibra.dgc.core.workflow.activiti.delegate > Interface: MailSender
[bok-callout]For an explanation of using the MailSender Delegate, go to: Designing Your First Workflow From Scratch > Defining a service task that sends and email-notification[/bok-callout]
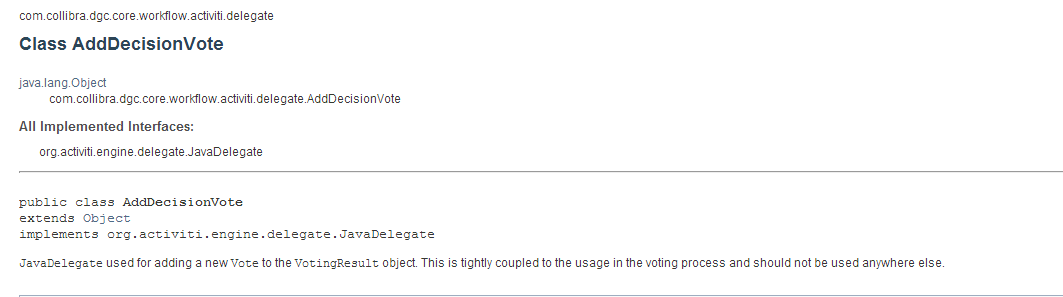
Step 8: Add Vote Outcome to List
Add a service task to count the votes. Then create an exclusive gateway the will operate based on if the option to add comments (via the form property addComments) is set or or not:

Set the properties:
Service Task > Properties Tab > Main config
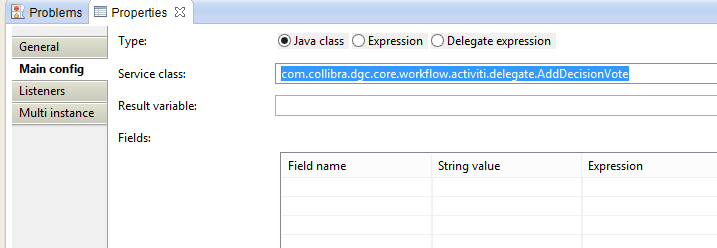
| Setting | Value | Description |
|---|---|---|
| Service Class | com.collibra.dgc.core.workflow.activiti.delegate.AddDecisionVote | See API documentation |
This Delegate Class can be found at: <yourCollibraDomain>/docs/index.html > core >Package: com.collibra.dgc.core.workflow.activiti.delegate > Interface: AddDescisionVote
Create the Exclusive Gateway and define the sequence flow outputs:
SequenceFlow > Properties Tab > Main config
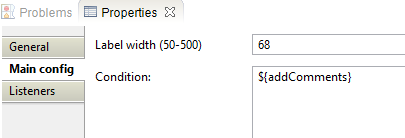
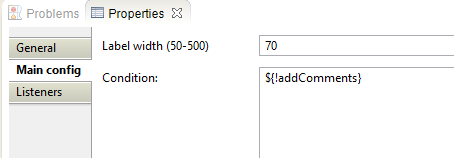
| Flow Name | Condition | Description |
|---|---|---|
| addComments | ${addComments} | Will result in “true” if comments are added |
| !addComments | ${!addComments} | Will result in “false” if comments are added |
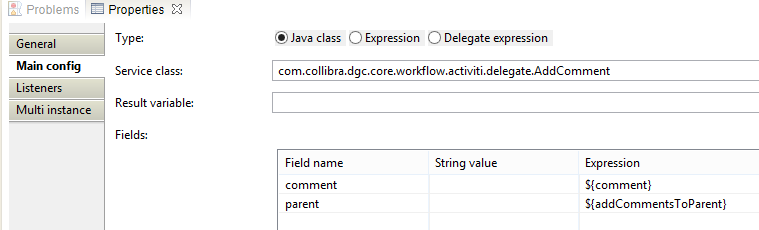
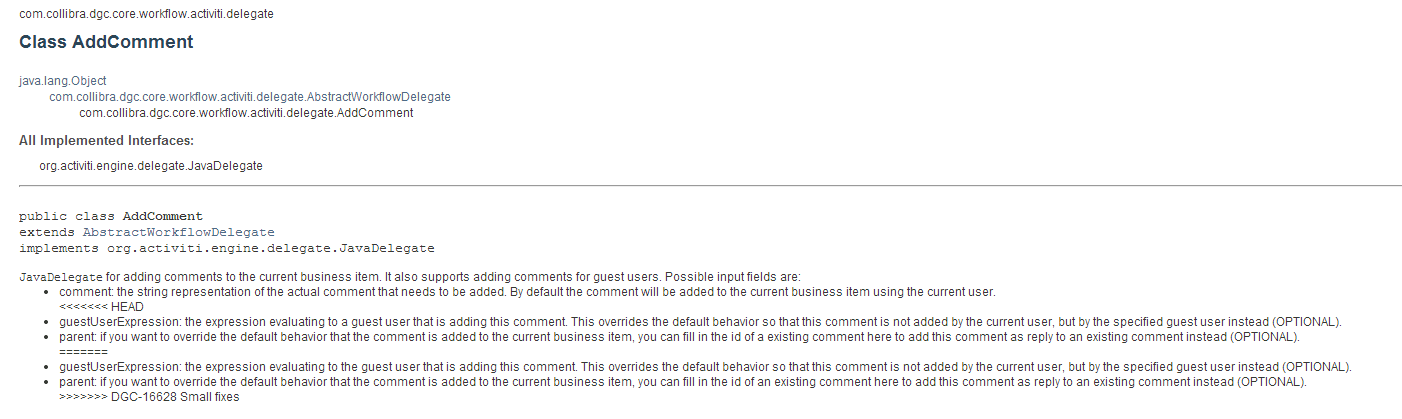
Step 9: Store Comment
Create a service task to store the comment. This service task will use the AddComment delegate. Then close the sub process

Set the properties:
Service Task > Properties Tab > Main config
| Setting | Value | Description |
|---|---|---|
| Service class | com.collibra.dgc.core.workflow.activiti.delegate.AddComment | AddComment Delegate class |
Fields:
| Field name | String value | Expression | Description |
|---|---|---|---|
| comment | ${comment} | The input for the comment text. Variable was created in previous user task. | |
| parent | ${addCommentsToParent} | The input field that will allows you to override the default behavior and add the comment to as a sub comment of a parent comment. See configuration variables for the parent comment Id. |
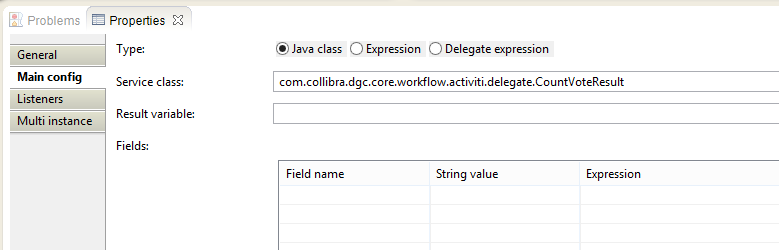
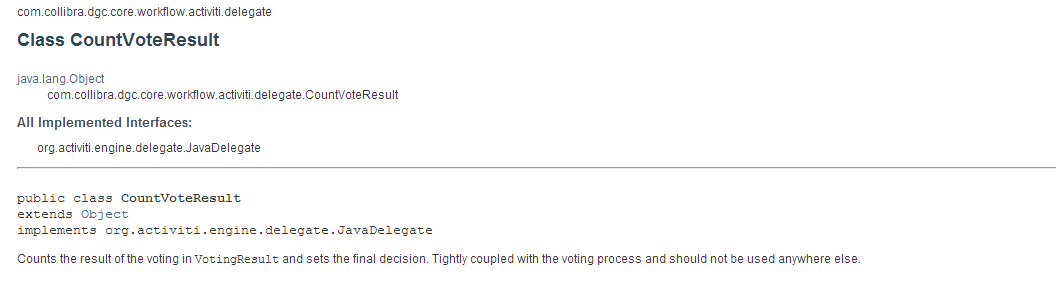
Step 10: Count voting result
Create a service task to count the votes that were added using the looped EventSubProcess:

Set the properties:
Service Task > Properties Tab > Main config
| Setting | Value | Description |
|---|---|---|
| Service class | com.collibra.dgc.core.workflow.activiti.delegate.CountVoteResult | This is the name of the delegate class |
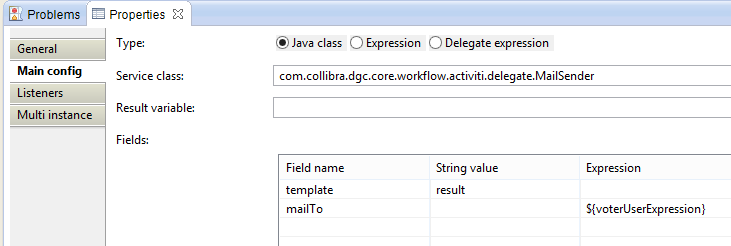
Step 11: Publish Result
Add a service task to send out an email notifying voters of the result:

Set the properties:
Service Task > Properties Tab > Main config
| Setting | Value | Description |
|---|---|---|
| Service class | com.collibra.dgc.core.workflow.activiti.delegate.MailSender | MailSender Delegate class |
Fields:
| Field name | String value | Expression | Description |
|---|---|---|---|
| template | result | This email will use the “result” email template. | |
| mailTo | ${voterUserExpression} | This is the list of voters. See the configuration variables |
You have to login to comment.